One of the most important pieces of equipment needed for getting proper softball or baseball practice is a pitching mound.
The problem which commonly arises, however, is that getting a permanent pitching mound is often a hard task.

On top of this, maintaining a pitching mound can be difficult, as well as expensive.
That is why we have put together this guide to make it, so you will know how to make a round pitching mound that is portable, so you do not have to worry about this problem.
You may be wondering how much it will cost to make your pitching mound, and this article will make it, so you can make one for under $150 if you use the correct materials and methods, which will lead to you saving around $200 if done properly.
If you want to make your pitching mound and want to save money and effort while doing so, this guide is perfect for you, so keep on reading.
What Is A Pitching Mound?
If you are not completely sure what the actual definition of a pitching mound is, this section will help you out.
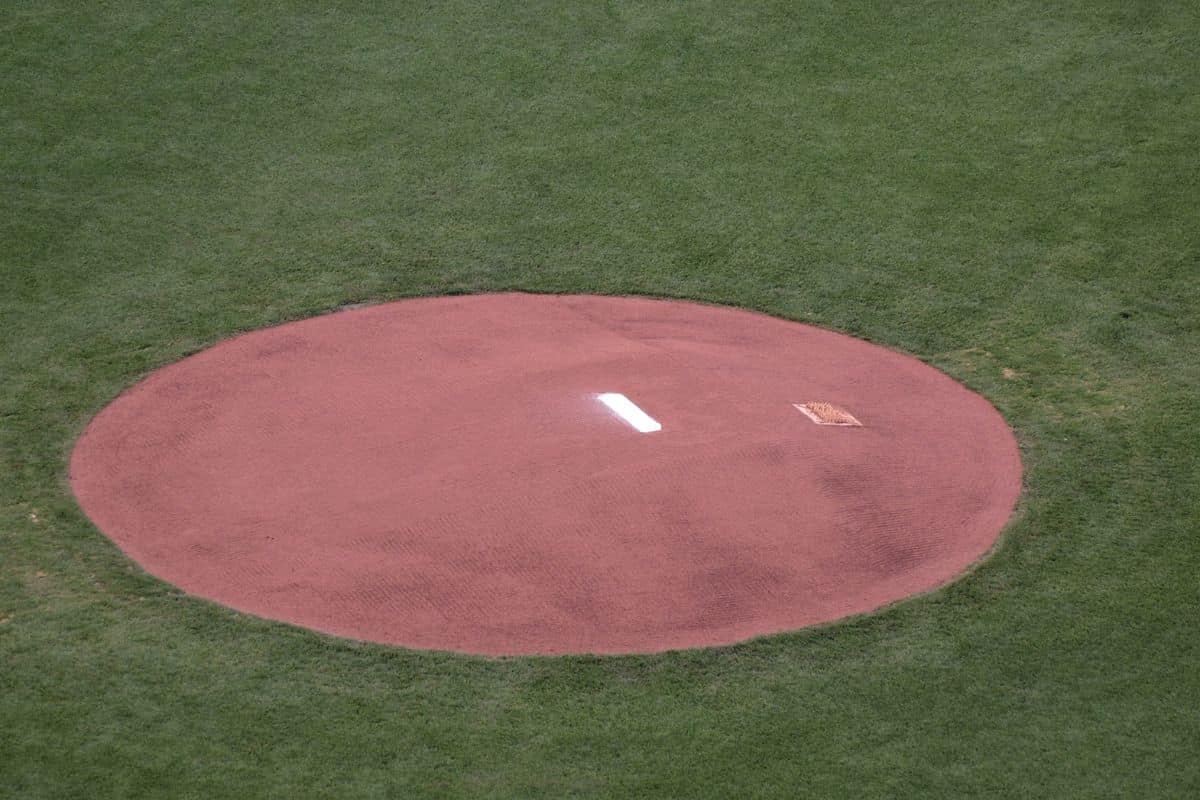
In a typical softball or baseball game, a pitcher will need to stand on a ‘dirt hill’ as they are pitching, and this dirt hill is officially called a pitching mound.
This pitching mound is defined by having a flat base that will not be over 10 inches above the ground, and on top of this, its floor will have a rubber plate.
The front of this pitching mound will also have a downslope that can be no longer than 6 feet.
History Of The Pitching Mound
If you want to know how the pitching mound originated, the story starts in 1860, when baseball became a more well-known sport.
However, it is still a far cry from what it is now, and many rules which define it now are still missing, as well as the pitching mound being absent. The pitching area was instead defined using a flat plate instead.
The idea of the pitching mound was first thought up in 1893, and this was when baseball players started using a rubber plate to raise the ground for the pitcher, which would give a pitcher the advantage of getting a faster pitching speed.
The use of a pitching mound became something that the MLB regulated in 1914, and at this point, the pitching mound was supposed to be 15 inches above the ground.
At present, the pitching mound is supposed to be 10 inches in height, and it must have a slope angle that descends at one inch a foot over the length of six feet.
There are many baseball-focused clubs and businesses which aim to reduce the price of maintaining a pitching mound, and this is why so many of them are now using a round and portable pitching mound to solve this problem.
Before this, no one had imagined the prospect of a pitching mound that could even be portable. No one, that is, except for its creator: John Montgomery Ward.
Why You Need A Portable Pitching Mound
Pitching mounds are a necessity as a training tool, and for this role can be incredibly useful. By having this tool, you will have more facilities than a permanent standard pitching mound will be able to provide.
You will also be able to save money through the lack of need for any expensive maintenance. This means your players can use it for a long time without needing upkeep.
On top of this, installing a permanent pitching mound will also be quite an expensive construction project and must be maintained by a specifically trained individual.
Each league has its different dimensions for dirt mounds; because of this, mounds will be inspected and usually rebuilt before standardized games, which is a time-consuming and expensive procedure.
This is why so many parks and stadiums are now opting to use a portable pitching mound instead, as they do not need frequent rebuilding.
Portable pitching mounds are also useful if you are in an area with unpredictable weather.
With a permanent mound, you will be unable to practice in certain weather conditions, but if you are using a portable mound, you have the option to practice whenever you want.
You can place the mound in any place large enough to use it in and start practicing.
When looking at all of these reasons and drawbacks of using a traditional permanent pitching mound, you can understand why portable pitching mounds were such a success upon their release.
Different Sizes of Pitching Mounds

When you are considering making or buying a portable pitching mound, you will need to make sure to think over what size you will need, as different sizes will suit different scenarios and situations better than others.
The different sizes which are common are:
- 6-inch portable pitching mounds are best for age groups that are under 11 years of age.
- 8-inch pitching mounds are ideal for players which are between the ages of 12 and 14
- 10-inch pitching mounds are what is recommended for any groups that are aged 15 and over, which is why these are the most common.
You will want to make sure that your pitching mound is the correct size for the context it will most commonly be used in.
Buying Vs. Building A Pitching Mound
Of course, this guide is focused on making your pitching mound, but you do always have the option of buying one too.
There are many pros and cons worth considering when making this decision, and people too often overlook factors outside of cost.
Some of the most important factors which should be considered are:
- Building a portable pitching mound yourself is good if you know the fundamental woodworking skills. You will need to have the time as well as the right tools, as well as knowledge of how to use both the materials and tools which are needed. This will be an enjoyable experience if you have this, but if you do not, this can be troublesome and will maybe not be worth the excessive knowledge needed to learn the fundamentals.
- Building a portable pitching mound will be incredibly satisfying, and if it is something that will get constant use, you can be satisfied that it is something that you have made yourself. However, if you are not confident with it, you will be responsible for if it fails and will not be able to claim any refunds.
- It is nearly always more expensive to buy a portable pitching mound than it is to make one with your skills. This means you do not have to compromise on any features of the mound, but you will be sacrificing significantly more time.
- Making and maintaining your pitching mound can be quite troublesome, and if you are not willing to put the correct amount of effort into the process, you will likely not get desirable results.
Please closely consider these reasons why you should or should not make your portable pitching mound, as you will definitely regret not closely considering them if you do not.
Tools Needed To Build A Portable Pitching Mound
You will want to make sure you have all the tools which are needed to make a pitching mound before you start the project.
You will not need to buy all the tools as some can be rented, but having everything beforehand will help keep your project running smoothly:
- Circular or table saw
- Large spike as well as screws
- Hammer
- Electric screwdriver
- Measuring tape
- Safety glass and gloves
- Sandpaper
- Good quality staples
- Strong wood glue
- Liquid nails
Recommended Materials Needed For Making A Pitching Mound
The materials needed for making your pitching mound are:
- Lamp set
- Roll of turf
- Caster wheat 2p
- Rubber plate
- 4×10 plywood board
Planning A Portable Pitching Mound (The Measurements)
For a 6-inch portable pitching mound, the correct dimensions are:
- 6 inches high above the ground
- The standing flat base will be 40 inches long
- The backboard is 48 inches long
- The front slope is 72 inches long as well as wide
- The front end slop is 2 inches high
- And the base length will be 96 inches
Tips For Making A 6 Inch Portable Pitching Mound
There are a few key concepts to keep in mind when making your own 6-inch portable pitching mound:
- You will want to make sure you have a strong foundation; if it does not, there is a chance that it could start to bend and warp due to the weight of the pitcher’s body.
- You want to ensure to put a rubber layer which is under the ground touching section of the frame, this will make sure the mound grips onto the floor. Using a rubber layer like this will also ensure that the floor is protected from any scratching which could damage it.
- You want to try to design your portable pitching mound in an origami style, this will make sure you can fold it once it is not in use and put it away whenever you need to.
- You want to use good quality as well as smooth turf to make your pitching mound, this will make sure the pitcher will be able to stand on it comfortably.
- You want to ensure the mound plans using wheels, this makes it significantly easier to carry around when you are trying to move it yourself.
Procedures For Making A Portable Pitching Mound

Make sure to thoroughly read the next sections before starting any work, so you will know how to make each section and ensure you have all the correct tools and materials before you start any work.
Front And Rear of Mound
- First, cut the plywood piece and make it 48 inches long and 6 inches wide. The easiest way to get a straight cut on this is to utilize a table saw if you have access to one.
- Second, make your second board 48 inches long and 2 inches wide.
These two pieces will be the back end and the front end of your pitching mound.
Center Support
- Use one of the four 8 feet long and 6-inch width boards. Place one of the boards in front of you. One of these boards will be the left side and then another will be the right side of your plywood (looking from your POV).
- Cut 24 inches of length off of the left end, and then mark this point. Next, draw a line that goes straight from this point and then take it to the end. Because this is a pitching mound which is 6 inches, the starting point will be 6 inches high. The line will descend towards the right and will then stop two inches high.
- Cut the board in a straight line. If possible, do this using a table saw, as it will give you the best pitching mound angle of slope.
Looking at the plywood board, you will have four main components:
- The first component is the 6-inch tall rear end
- The front end plywood is 2 inches high
- The flat base is 24 inches in length
- And then there is the 72-inch long slide which will have a 2 inches high end.
You will then want to repeat this process to ensure you have three identical shapes, which will end up being used as the support for the mound.
Stand Base And Slope
Get a plywood board and cut to 24 inches in length and 48 inches in width. This piece will be used as a standing base, and the other piece will be utilized for the downward slope. You want the second piece to be 48 inches wide and 72 inches long.
Secondary Support
If you want to ensure that your pitching mound is even more stable, you will need to get more supportive boards to prop up the center. Consider rectangular boards at 5 inches wide by 11 inches long for secondary support boards.
Round Portable Pitching Mound Step-By-Step Plans
Before you start putting together the pieces which you have prepared, you want to ensure that you have used some sandpaper to smooth off any rougher edges as well as any rough pieces.
First Step
First, place the front and back parts of your mound in a parallel position. Next, screw your four center pieces for support in a horizontal position to your back and front boards.
Second Step
Next, screw your standing plate and the slope onto the top of your base. In doing this, you will want to ensure that your wooden boards are perfectly aligned.
You will also need to be very careful about the slope angle you have for your pitching mound.
Third Step
To ensure that you have as much stability for your structure as possible, place your secondary support pieces under your mound, with one in every gap of one foot.
Make sure these are touching your standing base and will then slope with the support beams of the center. Make sure these are aligned horizontally and the plywood pieces are flush on each side.
Make a pitch while you are working on the mound to see if it will need more support beams.
Fourth Step
Add two caster wheels onto the rear board, ensuring the wheels properly touch the ground so transporting your portable mound will not be difficult.
Fifth Step
Cut your turf into lengths of 8 feet and 48 inches wide. Next, use glue to attach the pitching mound to the turf.
Make sure to do this carefully. Once this is done, you can attach the rubber plate to the center of the standing base area.
Sixth Step
Finally, apply your liquid nails onto all of the joints where it is needed. Once this has been done, add a thin rubber layer onto the bottom of your pitching mound.
This will make your pitching mound more stable and protect your surfaces from scratching.
Tips To Keep In Mind When Making A Portable Pitching Mound
When making your portable pitching mound, some points should be kept in mind.
- If there are any issues with your measurement, the edges of the pitching mound may begin to stick up, and if this happens, you will need to work out what has caused this issue. Make sure there are no pebbles or mud on the edges.
- When you are picking your pitching mound up, ensure that you are holding it at the correct angle so the wheel is carrying more weight than you are.
- Make sure that this pitching mound will always be placed on level ground.
- Do not start using this mound right after construction, as you need to let time for the glue to settle first to make it durable enough.
- Do not stand on it wearing metal spiked boots.
- Fenway Park Seating Chart: Best Seats To See the Red Sox - July 17, 2023
- What is RBI in Baseball: A Simple Explanation of The “Ribby” - July 3, 2023
- What is DFA in Baseball? A Term No Player Wants to Hear - July 3, 2023


